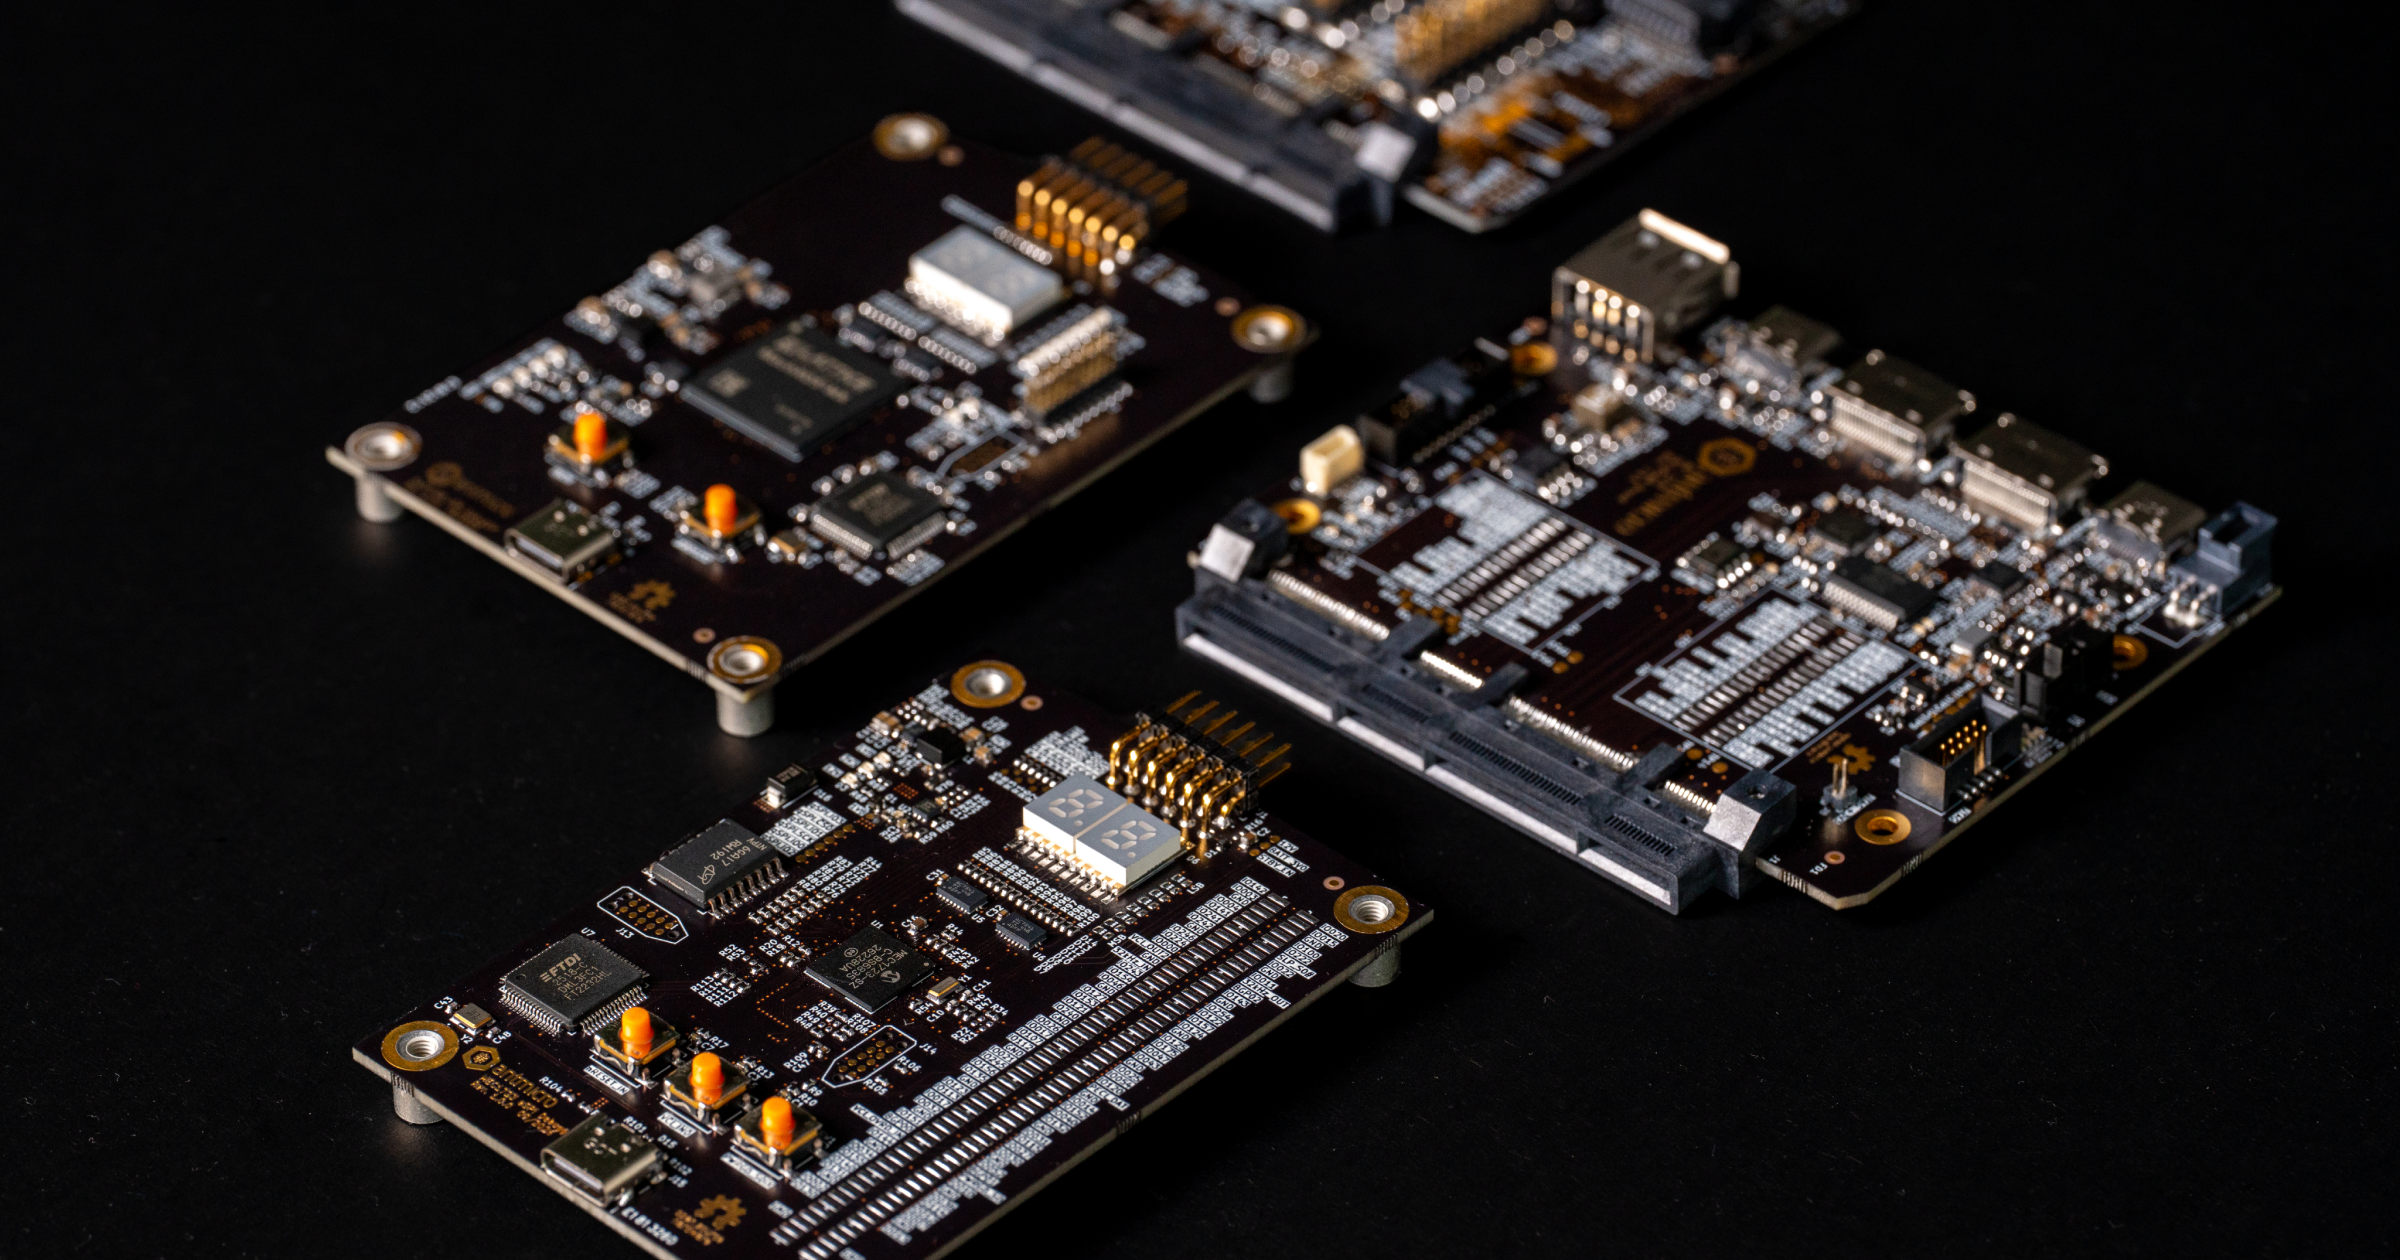
As a Platinum member of the Zephyr Project, Antmicro has been enhancing the Zephyr RTOS for years, improving its existing functionalities and adding support for new features. Recently, we have introduced USB support in Zephyr, which was followed by the development of an open hardware STM32H7 HDMI board - an ideal starting point for early development of graphics-oriented Zephyr devices.
Our implementation of USB support, paired with improvements to the HDMI support, extend the opportunities for using the RTOS in various fields. For example, it could prove significantly useful in the industrial domain, opening the way for faster, more streamlined development of embedded devices that require off-the-shelf displays with programmable UIs and rely heavily on those displays for visualization, monitoring, and control. grvl, our open source graphics rendering library, also fits greatly into such devices as it provides a lightweight way for GUI development. Combined, off-the-shelf devices and Zephyr can create simple yet efficient setups that do not require high levels of customization and provide the necessary elements such as displays and human interface devices, much like any PC setup.
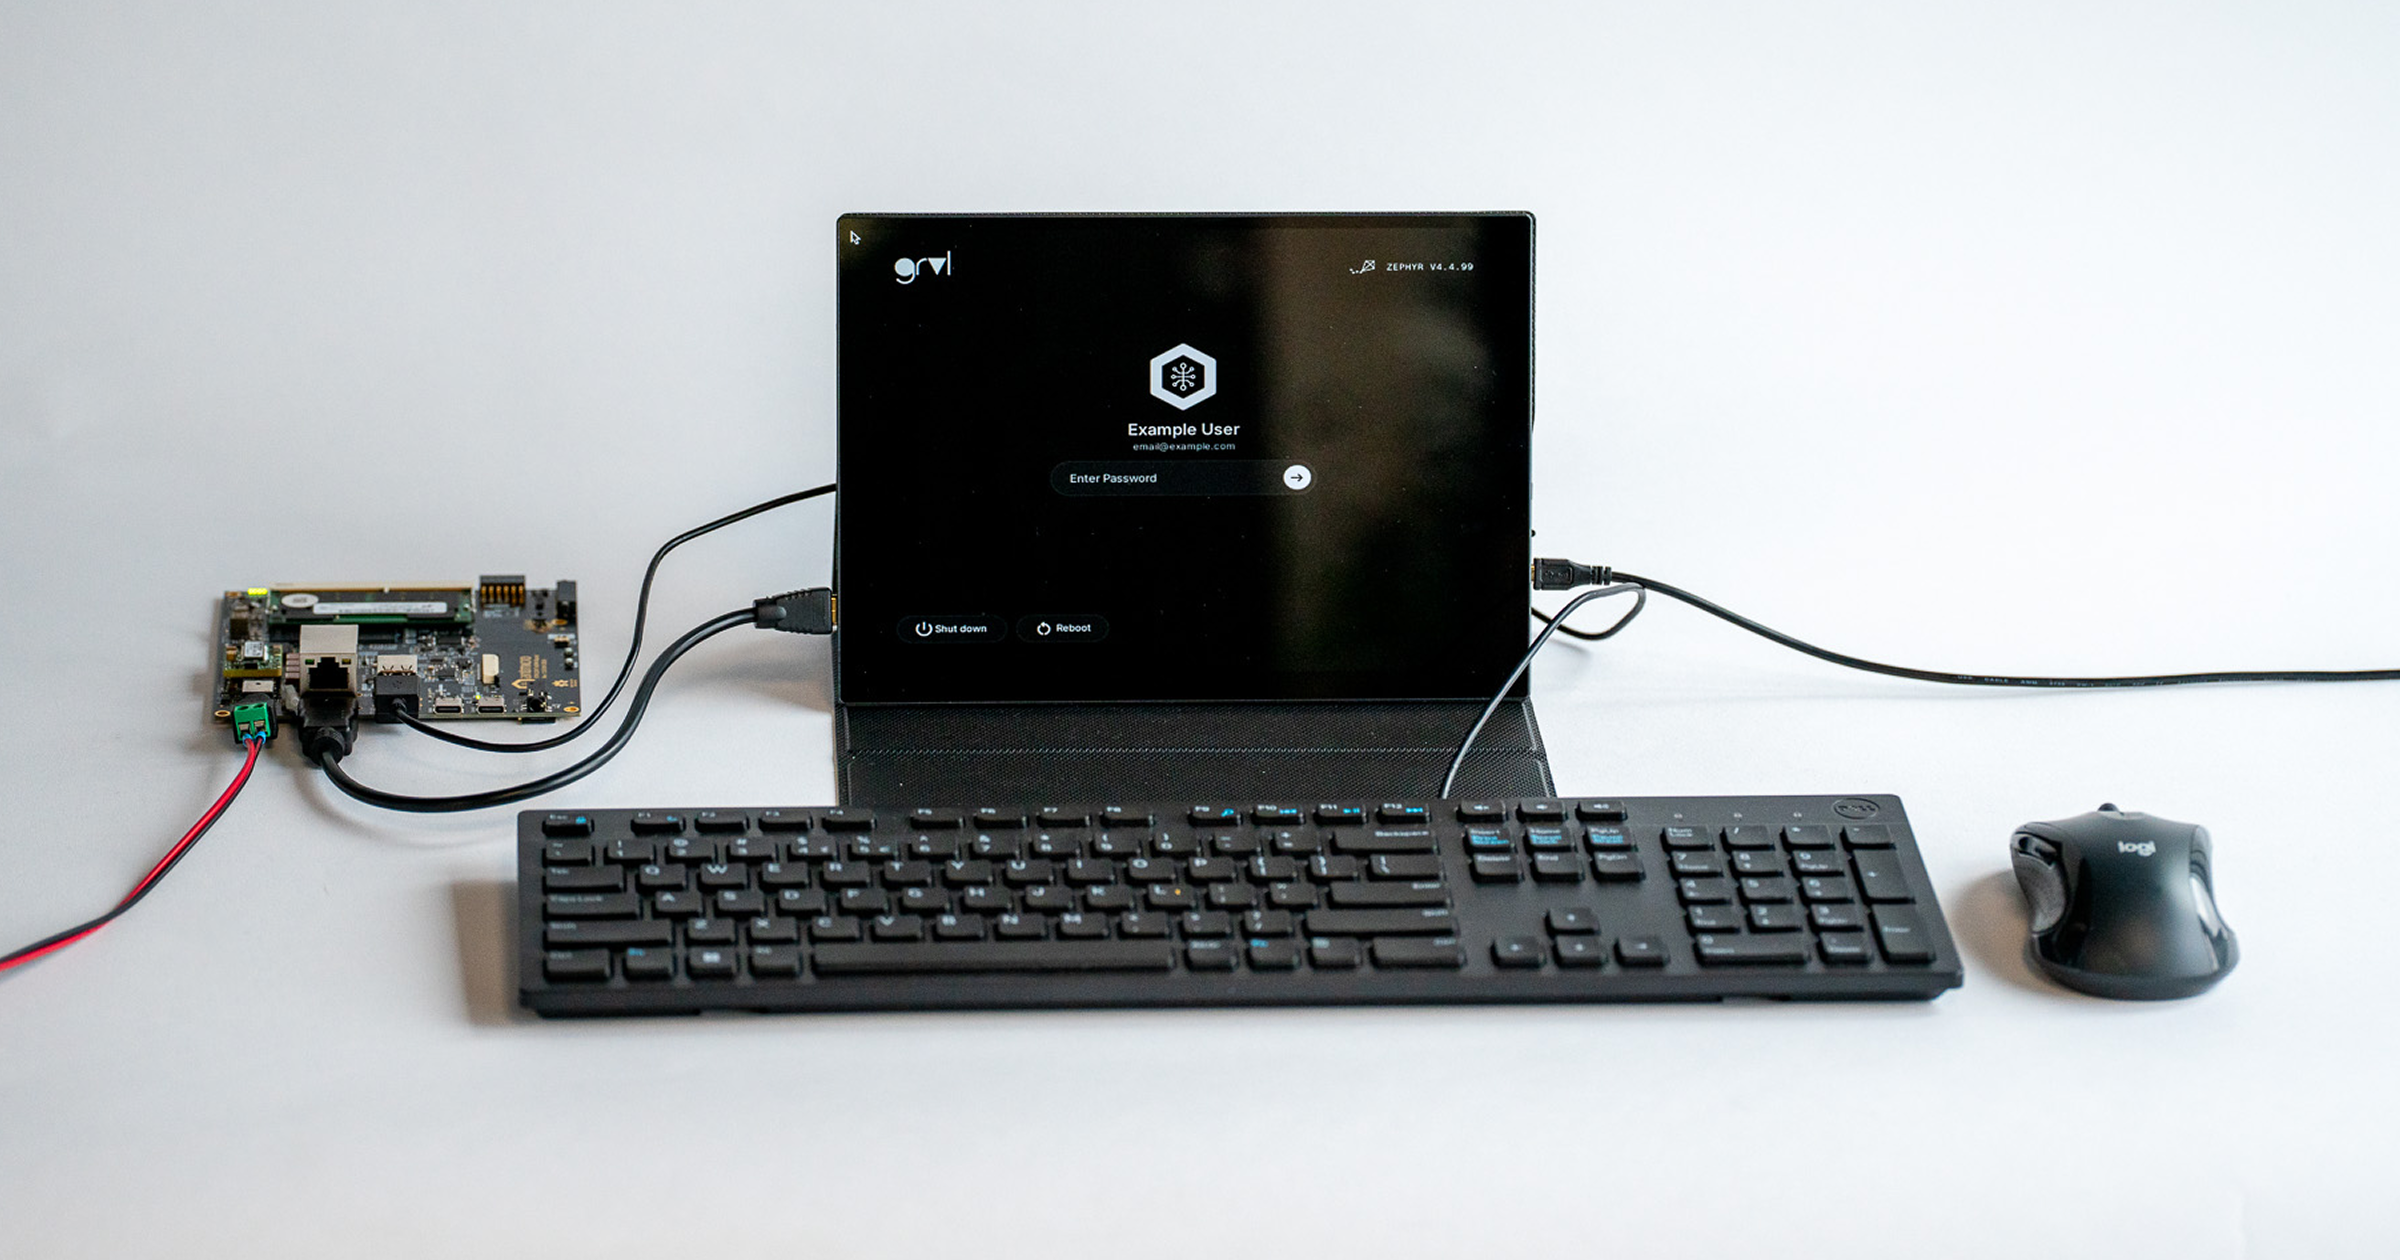
In this article, we provide a demonstration video showcasing an easy-to-replicate PC-like setup consisting of our recently released STM32 HDMI board, with an off-the-shelf mouse and keyboard to show a sample application made with grvl. We then describe how it functions and explain how to duplicate it to create a similar environment for using Zephyr in a PC context.
Achieving a PC-like experience: displaying a grvl-rendered login screen in Zephyr
To showcase Zephyr’s ability to render graphics, as well as the functionality of mice and keyboards connected through USB, we created a PC-like demonstration setup that displays a login screen on an HDMI monitor, rendered directly in the Zephyr RTOS. The login screen was implemented using grvl (Graphics Rendering Visual Library):
The setup involves our STM32H7 HDMI Board powered by any 7-24VDC power supply, and after that it’s just like with a regular PC - connect a keyboard and a mouse to the USB ports on the board, then you can connect a monitor with a regular HDMI cable.
The application code below shows initialization of grvl and the main loop as it was done in this demo:
const device* display = DEVICE_DT_GET(DT_CHOSEN(zephyr_display));
grvl::ZephyrApp app {display};
grvl::Application::Init(&app);

while (true) {
    // (...)
    app.Render();
    app.Swap();
}
Thanks to the seamless integration with Zephyr RTOS, grvl is ideally suited for designing UIs in modern embedded systems offering new opportunities for building nice-looking lightweight UIs broadcast on connected HDMI screens.
USB HID inputs are natively and conveniently handled with callbacks through Zephyr’s input API:
static void usb_hid_event_cb(struct input_event *event, void *user_data)
{
	// (...)

	k_mutex_lock(&mouse_cursor_lock, K_FOREVER);
	if (event->type == INPUT_EV_REL) {
		handle_rel_event(event, user_data);
	} else if (event->type == INPUT_EV_KEY) {
		handle_key_event(event, user_data);
	}
	k_mutex_unlock(&mouse_cursor_lock);
}

INPUT_CALLBACK_DEFINE(NULL, usb_hid_event_cb, NULL);
The event structure which is provided as a callback argument contains all the information about the input event - be it a mouse or a keyboard.
The grvl library itself uses Zephyr’s display API to initialize the display and output the HDMI signal:
bool ZephyrApp::InitDisplay(const device* dev)
{
    struct display_capabilities caps;

    if (!device_is_ready(dev)) {
        LOG_ERR("Display %s initialization failed", dev->name);
        return false;
    }

    display_get_capabilities(dev, &caps);

    this->width = caps.x_resolution;
    this->height = caps.y_resolution;
    this->bpp = DISPLAY_BITS_PER_PIXEL(caps.current_pixel_format) / 8;

    if (width == 0 || height == 0 || bpp == 0) {
        return false;
    }

    display_descriptor = {};
    display_descriptor.buf_size = width * height * bpp;
    display_descriptor.pitch = width;
    display_descriptor.width = width;
    display_descriptor.height = height;

    LOG_INF("Using display %s, (width: %d, height: %d, bpp: %d, size: %d)",
        dev->name, width, height, bpp, display_descriptor.buf_size);

    display_blanking_off(dev);
    return true;
}
After initialization the usage is as easy as just providing a pixel buffer to Zephyr:
void ZephyrApp::Swap()
{
        Stopwatch watch {};
        display_write(display_device, 0, 0, &display_descriptor, framebuffer);
        Manager::GetInstance().perf.swap_times.put(watch.stop());
}
display_descriptor from the code above is a small structure which we’ve initialized earlier and framebuffer is a pointer to the actual display data.
Regarding the hardware implementation, to make your device capable of transferring an HDMI signal, you need to configure it with the ADV7535 connected to the MCU over the I2C interface and make sure the MCU has a DSI host controller. If your device already has a DSI port, you can add the ADV7533 chip using the DSI to HDMI adapter.
For more concrete examples, refer to the official Display Subsystem documentation.
Antmicro’s STM32H7 HDMI board as a starting point for developing display-enabled devices
An easy way to connect a screen to a device offers a lot of flexibility to developers who build products that rely on connected displays and require compatibility between those displays and host devices. While being prevalent in devices running on Linux, HDMI used to have minimal support in Zephyr, restricting its use in embedded industrial applications.
Zephyr, in turn, does have extensive support for the MIPI DSI video transmission standard, which is primarily used for internal connections between SoCs and display panels. MIPI DSI is supported across multiple hosts and has well-defined APIs in the Zephyr RTOS.
Antmicro has recently leveraged the underlying capabilities of MIPI DSI to transmit an HDMI signal in the mentioned open hardware STM32H7 HDMI technology demonstrator targeting Zephyr, using a DSI video generator with the ADV7535 bridge to convert a DSI signal to HDMI. The project also involved work on a driver for the ADV7535 chip from Analog Devices (its predecessor, the ADV7533 MCU, is supported as well), which was contributed to upstream Zephyr.
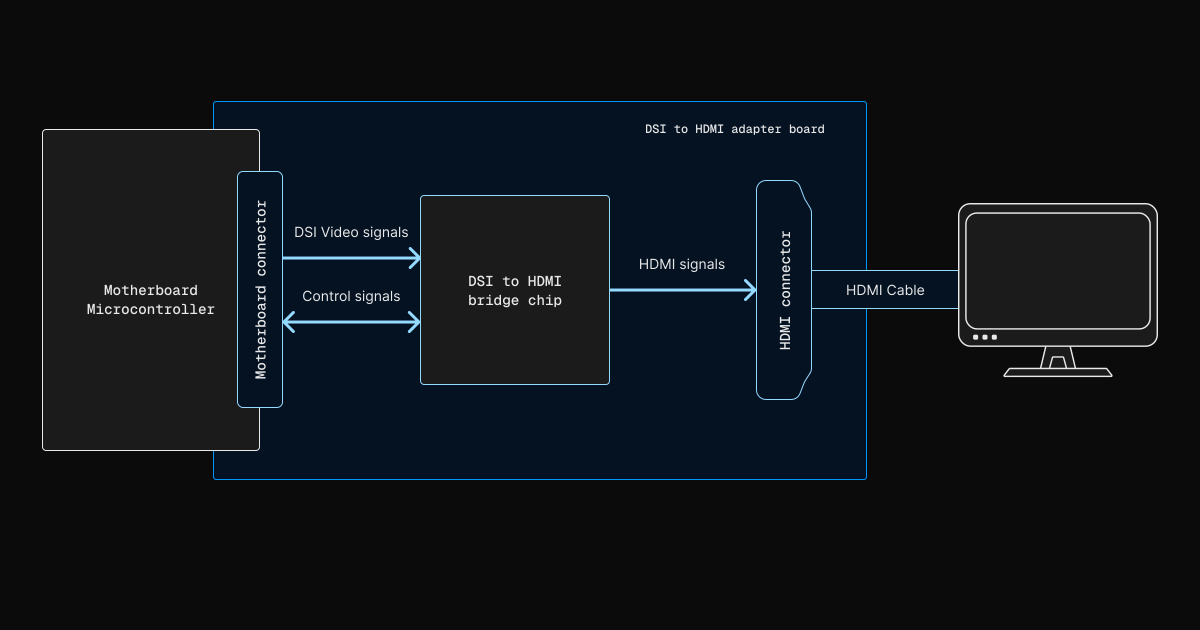
Since instead of introducing HDMI video generation we used the MIPI/DSI to HDMI bridge chip ADV7535, this enables easy integration of HDMI into any DSI-compatible device running Zephyr RTOS without the need to write any extra code.
Notably, using the board’s HDMI support, we have achieved a maximum display resolution of 1920x1080p with a refresh rate of 30Hz, which is fairly close to the maximum supported resolution of the integrated ADV7535 chip (its max supported resolution is 1920x1080p with a refresh rate of 60Hz). The board supports multiple display modes, including 640x48@60Hz, 800x600@60Hz, 1024x768@60Hz, and 1280x720@60Hz.
HDMI has become the go-to standard for transmitting high-definition video and audio between devices, from consumer electronics to automotive and industrial systems, as it supports a wide range of resolutions and frame rates and is compatible with most modern displays. Similarly, the versatility of Zephyr, its vendor neutrality, and hardware agnosticism make it a great foundation for easily scalable resource-constrained devices where real-time control and data processing are critical. This is particularly relevant to industrial applications that require high-reliability and low resource consumption - industrial control systems, human-machine interfaces (HMIs), and predictive maintenance systems, to name a few.
Zephyr now allows for easy connection between source devices and their external displays. This opens doors for using the RTOS more extensively in fields where the reliability and flexibility of Zephyr prove valuable in applications which rely on connected screens for displaying real-time data. As such, our recently released STM32 HDMI board, which was primarily developed with Zephyr in mind, makes for a great board for prototyping Zephyr devices that are developed for industrial systems, and beyond.
Additionally, grvl, being open source and lightweight, allows for developing and customizing GUIs for embedded devices using XML, with an embeddable JavaScript engine and support for PNG and JPG graphics. To learn more about grvl’s features, we have a dedicated blog article about it that you can refer to.
Streamline the development of your Zephyr-based applications with Antmicro’s end-to-end engineering services
When combined together, Zephyr’s USB and HDMI support, Antmicro’s STM32H7 HDMI board and grvl unlock new opportunities for using the RTOS more extensively across multiple domains and use cases.This is specifically significant in the context of industrial resource-constrained systems and kiosk devices that require transmitting high-definition media between electronic devices over a single, easy-to-route cable.
Antmicro can help you design, prototype, and build products running Zephyr RTOS, test them in a fully deterministic environment with our open source simulation framework Renode, build custom interfaces for control and management of your embedded systems, and leverage our open source Over-the-Air update framework RDFM for creating custom fleet management systems to remotely manage and update a fleet of your Zephyr devices.
You can also use our services to power up embedded applications with AI capabilities: our Kenning Zephyr Runtime library enables seamless development of ML models on Zephyr devices, you can easily automate the creation of ML models with our AutoML module, and any AI execution bottlenecks can be quickly identified and analyzed with the Zephelin AI Profiling Library.
If you’d like to use our commercial services to adapt Zephyr to your real-world scenarios, contact us at contact@antmicro.com.